What Is Surface Pretreatment?
Surface pretreatment is a process where you clean and prepare a surface for the next step in your project, whether that’s painting, electroplating, or applying liquids like adhesives and sealants.
Why Is Surface Pretreatment Important?
Performing this step is a vital component in your industrial project because it can prevent surface contamination and create a smooth barrier for your adhesive to stick to.
Without this step, your surface may be more vulnerable to common contaminants, such as dust, grease, and surface moisture. By performing the proper surface pretreatment procedures, you can remove all unwanted substances and increase the surface area of your material to improve bond adhesion.
This is the key to increasing the lifespan and durability of your industrial glue.
How Do You Perform Surface Pretreatment?
If you want to learn more about surface pretreatment, there are two essential steps you need to follow to maximize results. These are the preparation and the pretreatment phases.
Surface Preparation
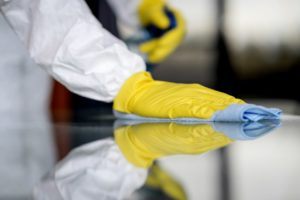
The preparation phase involves cleaning and degreasing your surfaces to create a clean slate for your adhesives to cling to.
- Cleaning: In many cases, cleaning requires a good scrubbing process with a one-to-one mixture of alcohol and water. The alcohol works to dissolve any grease found on the surface, while the water can eliminate accumulated dust. Alternatively, you can use a soap and water mixture to remove any contaminants on the surface. Just make sure to rinse the soap completely to avoid encountering issues with the adhesive.
- Degreasing: If you’re having a hard time removing grease from the surface, we recommend you use a stronger cleaner such as acetone or an enzyme cleaner to remove all traces of oil. If you’re dealing with dried grease, you can remove it with a solution of four parts baking soda and one part water.
Surface Pretreatment
After doing the initial surface preparation, it’s time to move on to the pretreatment phase, which can include either a chemical, mechanical, or physical treatment. The goal of this step is to further smoothen your work surface and ensure a much stronger bond with the adhesive. Below are some of the pretreatment methods you can explore.
Abrading
Abrading involves grinding and polishing the surface with the use of friction. It removes the potentially contaminated outer layer of the material and exposes the clean inner layer. Then, you can apply your glue, paint, or other liquid to the clean, freshly-exposed layer.
Depending on the level of abrasion you need, you can use tools like scrub pads, sandpaper, fine steel wool, or a palm sander.
Flame treatment
Flame treatment is a chemical method used to modify the surface for much better adhesion. The process generally works best with low-energy surfaces like composites and plastics, which tend to be more difficult to use adhesion with.
Compared to abrading, this approach is much gentler and poses a lower risk to the material. It uses a controlled combination of air and natural gas to create oxygen-rich plasma, which can remove contaminants and activate the surface through oxidation. As a result, you can transform the low-energy surface into a high-energy exterior, ideal for printing, painting, bonding, or coating.
Plasma treatment
Much like the flame treatment, the plasma treatment is used to modify or alter the properties of the surface to make them glue, paint, or bond more easily.
For this to work, you need to perform this method in an enclosed chamber that releases air and allows ionized gas (plasma) to flow freely at low pressures. When this gas interacts with the surface, it can change the form of the matter, preparing it for adhesion.
As effective as these pretreatment methods are, you need to ensure that you’re implementing the right technique on the right surface. Only then can you guarantee the best adhesion for your industrial project.
Surface Pretreatment for Each Substrate
Different substrates require different pretreatment methods. That being said, you need to learn how to match the preparation methods to the substrate to get the ideal results.
Metal Pretreatment
Metals are known to be rather strong and durable. Because of this, they can be tougher to work with than other substrates. But generally, preparing metals requires chemical cleaning with solvent solutions to eliminate hard-to-remove residues. Likewise, they need a more physical approach like sanding or abrading to create a clean and level surface.
Here’s a step-by-step process to help you prepare your metals for adhesion:
- Wipe the surface using acetone and a clean cloth
- Sandblast or abrade the exterior with fine-grit sandpaper to get rid of surface deposits
- Clean the new surface again with acetone to make sure that debris and loose particles are completely removed
- Let the exterior dry completely before applying your adhesive
Wood Pretreatment
As organic material, wood is often contaminated with dirt, dust, and grime. But in some cases, you may encounter residual resin and wax when working with a wooden surface. To prepare and pretreat this type of substrate, you need to clean the outer layer with solvents.
If there are cracks or uneven spaces, you may need to fill them in with a wood filler to create an even surface. Once it’s dried, you can further sand it down to create a smooth and even layer.
Plastic Pretreatment
Due to the nature of plastics, it’s easy for contaminants like oil, dirt, dust, and grease to stick to the surface. To clean this type of substrate, you need to use liquid solvents and execute chemical surface modifications (like a flame or plasma treatment) to prepare it for adhesion.
Conclusion
Preparing your surface for gluing or painting is an essential first step in any industrial project. With our guide, you can get a firmer grasp on the proper ways to pretreat your surface and see the desired results.


